Category Archives: Recreation and sports

Mount Kilimanjaro Packing List

In this Mount Kilimanjaro packing list we break down the items you need to collect and test well advance. Some items are a must have, some are important or good to have while others are luxury items.

Below is the list

Key
**** Crucial to have
*** Important to have
** Good to have
* luxury

ITEM Description QTY Cost (Ksh) Total cost(Ksh)

Clothing

Rain coat or poncho with hood**** Waterproof enough to keep off heavy rain 1 7,000.00 7,000.00
Warm jacket**** Water resistant and breathable- can be made of down, thinsulate or fleece. Down and fleece dry much faster than wool 1 15,000.00 15,000.00
Long Sleeve thermal vest*** 3 2,000.00 6,000.00
Short Sleeve Shirt, light-weight, moisture-wicking fabric 5 2,000.00 10,000.00
Waterproof trousers, breathable (side-zipper recommended)*** 1 8,000.00 8,000.00
Hiking Pants (convertible to shorts recommended)**** 1 9,000.00 9,000.00
Long Underwear (moisture-wicking fabric recommended) 2 2,000.00 4,000.00
Underwear (boxers or briefs)*** moisture-wicking fabric recommended
choose something that allows you to change in the presence of women
3
Gloves, warm (waterproof recommended)**** 1 1,000.00 1,000.00
Brimmed Hat, baseball cap for sun protection*** 1 500.00 500.00
Warm Head wear**** Fleece or woollen cap. If you choose one that covers the sides and neck then you don’t need the balaclava and scarf 1 1,000.00 1,000.00
Balaclava or scarf** 1
Hiking Boots**** High cut, warm, waterproof, broken-in, half or one size larger to allow wearing excess socks. 1 15,000.00 15,000.00
Gym shoes, trainers or sneakers*** To wear at camp 1 4,000.00 4,000.00
Socks**** Thick, woollen or fleece. You might want to get a pair to use when testing boots 6 200.00 1,200.00
Gaiters** Effective in keeping water, pebbles out of your shoes and the lases in place 1 1,500.00 1,500.00

Equipment

Sleeping Bag*** rated +10 to +35 0F.
Go for mummy type (with hood) as opposed to rectangular because it fits close to the body leaving less chance for cold spots.
1 7,000.00 7,000.00
Head lamp, with extra batteries**** for summit night 1
Rucksack*** Enough for porters to carry your equipment in. Kili porters are allowed to carry only 15 Kg of your gear. Line it with garbage bags for extra water resistance. Use stuff bags to separate things e.g. socks and underwear, sleeping bag, toiletries, T-shirts, rainwear, used clothes etc. 1 5,000.00 5,000.00
Backpack**** with waterproof cover for you to carry items you may require during the day and delicate items like electronics and glass. 1 5,000.00 5,000.00
Sunglasses or Goggles*** Snow blindness can be catastrophic after Gilman’s point. Test glasses that you can wear on your spectacles 1
Vacuum flask* To carry hot water to use after 5000 metres 1
Camel-back water pouch*** Two litres capacity. Your potter can carry the extra water 1 2,000.00 2,000.00
Small Towel*** lightweight, quick-dry 1
Stuff bags* to keep gear dry and separate e.g. a pouch each for shoes, socks and underwear, sleeping bag, wet towels, garbage, T-shirts, rainwear, used clothes etc. 5 200.00 1,000.00
Other
Toiletries****
Prescriptions***
Sunscreen***
Lip Balm***
Hand Sanitizer***
Toilet Paper***
Wet Wipes***
Snacks, light-weight, high calorie, high energy (optional)***
WC liner*
Pencil and Notebook, miniature, for trip log (optional)*
Camera, with extra batteries*
Power bank* from 10000mAh. Keep devices in Aeroplane mode to conserver power. 1 10,000.00 10,000.00
Book reader/ePad*
Board game (if in a group)*
Cost
The direct cost of the trip from Nairobi are as follows
To JKIA and back 1 10,000.00 10,000.00
JKI-JRO return ticket 1 40,000.00 40,000.00
JRO-Moshi and back 1 9,000.00 9,000.00
Trip Charges covers hotel accommodation, accommodation on the mountain, porters salaries, food, travel to the park gate 1 40,000.00 40,000.00
Tips for sharing with your climb partners per the whole trip.
– Support Crew sh300-sh400
– Cook sh600-sh800
– Chief Guide/guide sh1,000-sh1500
– assist Guide sh600-sh800
1 4,000.00 4,000.00
Statutory Requirements
Passport
Yellow fever Papers
For prep hikes https://www.facebook.com/groups/hikerske/
https://www.facebook.com/groups/123821337675197/
For hiking gear www.nairobisportshouse.com
www.kingscollection.co.ke
http://www.sportsdirect.com/
https://www.thenorthface.com/
https://www.jumia.co.ke
http://www.yaya-centre.com/?portfolio=extreme-outdoors

Mount Kilimanjaro Trekking

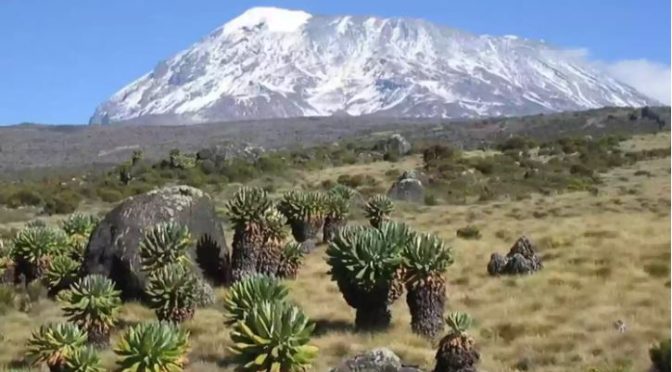
Reaching the Uhuru peak of Mount Kilimanjaro in Tanzania is in the bucket list of many. Reaching Uhuru Peak (5,895m) does not require technical mountaineering skills. However, one needs to be physically fit and mentally prepared because the days spent on the mountain can take a toll on anyone who is not well acclimatised.

Many people considering trekking Kilimanjaro ask what the best route is. “Best” can mean anything. But perhaps most people asking this question mean which route guarantees success.

For beginners, an 8- to 9-day itinerary provides the highest chance of a successful summit.  However, a long stay increases the probability of getting ill due to long exposure to cold.  Also, fatigue of waking every day to walk begins to take root on day 5. A long stay is also more expensive and requires packing more personal stuff.

To ensure success summiting Kilimanjaro, one needs to anticipate the difficulties and make plans to surmount them.
These are:
1. General fitness
2. Endurances fitness.
3. Altitude

1. General fitness: Establish that the body is fit enough to withstand sub-zero temperatures and other vagaries of outdoor living for five to six days. It is also important to note the bod’s ability to adabt to abrupt change of diet. Hand in hand to this is the mental attitude and willingness to go through it.

2. Endurance fitness: In general the body should be able to withstand four contiguous days of uphill walking for five to six hours daily while carrying about six Kilograms of gear. This calls for strict regimes of exercises that can be done in the house, field or gym, such as cardio, squats, jogging, treadmill or skipping rope.

3. Altitude: Hiking and trekking at least once every two months preferably in altitudes over of 2500 metres e.g. Ngong hills, Longonot, Oldonyo sabuk, Kinari forest, Elephant hill, Kipipiri, mount Kenya (preferably to Leanna point) will give the body the much needed acclimatisation.
It is important to deliberately choose at least one wet season hike in order to test rain gear.

Acclimatisation and fitness

Acclimatisation can be achieved by progressively climbing smaller mountains like Ngong Hills, Aberdares and Mount Kenya. Fitness can be achieved by walking at least six kilometres every day for one month.

Popular Routes

    • Lemosho Route: Widely considered the best overall. It starts on the western side, is highly scenic, features a very high summit success rate, and offers excellent acclimatisation. 
    • Machame Route: Often called the “Whiskey Route.” It is the most popular, highly scenic, and physically demanding, but it requires a careful pace.
  • Marangu Route: The only route with hut accommodations. It is known as the “Coca-Cola Route” and is shorter, but its steeper ascent results in lower summit success rates.
  • Northern Circuit: The longest and most remote route. It circles the northern slopes and is ideal if you want to avoid crowds and maximise your acclimatisation. 
Preparation
    • Fitness: You do not need to be a professional athlete, but you should be comfortable walking 4 to 8 hours daily. Focus on long day hikes with elevation gain, stair climbing, and general cardiovascular endurance.
    • Acclimatisation: Altitude sickness is the primary reason people fail to summit. Opt for longer itineraries, “hike high, sleep low” strategies, and keep a very slow and steady pace. [1, 2, 3]

Practical Information

    • Local Guides: All climbers are required by Kilimanjaro National Park to hike with a licensed guide and crew. Use reputable tour operators (many base out of Moshi or Arusha) to ensure porter safety and well-maintained equipment.
    • Cost & Booking: Permits, guides, and food typically cost anywhere from $2,000 to $4,500+ USD per person, depending on the route and the number of days.
    • Best Time to Go: The driest and warmest months are typically from January to March and June to October. 


Below is a list of items that one needs to collect and test in advance in order to make the climb as friendly as possible.
I have used the key below to rate the items

Key
**** Crucial to have
*** Important to have
** Good to have
* luxury

Hiking and Trekking

Kenya is known for its vast savannahs, iconic wildlife, and sunny coastlines. However, beyond the tourist spots lies a quieter adventure that unfolds with each step. Hiking and trekking in Kenya provide a chance to experience the country in its rawest form. Each trail tells a story, and every summit offers more than just a view.

From Mount Kenya’s misty peaks to the Aberdare Range’s rolling ridges, the dramatic cliffs of Hell’s Gate, and the hidden forest trails, Kenya is a hiker’s paradise. Whether you’re an experienced trekker or a casual walker, there’s a trail for you.

What Makes Hiking in Kenya Special

In a day, you might traverse bamboo forests filled with bird songs, open moorlands with giant lobelias, and rocky outcrops scraping the sky. Each ecosystem feels like a different world, blending into one unforgettable journey. Kenyan trails are alive with wildlife and culture. It’s common to see antelopes and giraffes alongside cattle, and you might even hear colobus monkeys warning other animals of your presence, just as they once alerted freedom fighters.

For many, hiking is a gateway to greater adventures. Trails in the Aberdares, Ngong Hills, and Mount Longonot prepare hikers for climbs like Mount Kenya or Kilimanjaro. They build endurance and introduce the rhythm of the mountains—the slow pace that turns effort into joy. More than training, these hikes offer a chance to disconnect from daily life and reconnect with nature.

Trail Diversity

Trekking in Kenya offers unique freedom. You’re not limited to one experience; one weekend you could navigate forest trails, and the next, climb a volcanic crater with sweeping views of the Rift Valley. The ever-changing landscapes and challenges make every hike feel fresh and rewarding.

Hiking transforms perspective. Standing on a ridge as clouds roll beneath you or reaching a waterfall after hours of climbing reminds you of your limits and strength. The journey isn’t easy—there are steep climbs and moments of doubt—but that’s what makes it worthwhile. Each step becomes a small victory.

Growing Popularity

Hiking has surged in popularity across Kenya. More people are discovering the joy of walking in the wild. It’s not just for seasoned adventurers anymore; it’s a lifestyle and a form of wellness. Organised hikes, solo treks, and group adventures are part of a growing outdoor culture.

So, whether you’re lacing up your boots for the first time or returning to the trail, Kenya invites you to explore, challenge yourself, and discover beauty beyond the ordinary. All you need to do is take that first step.

Swimming in Kenya

Whether you’re taking your first strokes, training for competition, searching for the best swimming pools, or exploring Kenya’s beautiful open-water destinations, you’ve found the right place.

Our blog is dedicated to bringing together swimmers of all ages and skill levels with expert advice, local guides, inspiring stories, and the latest swimming news from across Kenya.

What You’ll Find Here

Swimming Tips & Techniques
Improve your swimming with practical tutorials, training plans, stroke guides, and fitness advice.

Best Places to Swim in Kenya
Explore public pools, private clubs, hotel pools, beaches, lakes, and open-water swimming destinations across the country.

Learn to Swim
Resources for beginners, parents looking for swimming lessons for children, and adults learning to swim with confidence.

Competitions & Events
Stay informed about local swim meets, championships, triathlons, and community swimming events happening throughout Kenya.

Water Safety
Learn essential water safety skills, lifesaving techniques, and drowning prevention practices to help keep everyone safe.

Stories from Kenyan Swimmers
Read inspiring journeys from athletes, coaches, parents, and everyday swimmers who are helping grow the swimming culture in Kenya.

Why Follow Our Blog?

  • Local content tailored for swimmers in Kenya
  • Expert swimming advice for every skill level
  • Reviews of swimming facilities and equipment
  • Training tips for fitness and competitive swimming
  • Updates on swimming clubs, academies, and events
  • Practical guides for healthy, active living

Join Kenya’s Growing Swimming Community

Swimming is more than a  sport—it’s a lifelong skill, a source of fitness, and a way to connect with others who share a passion for the water.

Whether you’re swimming for fun, health, competition, or adventure, we’re here to help you dive deeper into the world of swimming in Kenya.

Start exploring our latest articles, improve your skills, discover new swimming destinations, and become part of Kenya’s vibrant swimming community.

Dive In Today

Read. Learn. Swim. Repeat.

Recreation and Sports

About This Blog

Everyone wants to engage in a recreational activity at some point. This could be outdoors or indoors. Maybe you’re looking for somewhere quiet, or somewhere lively and noisy. Sometimes, you simply want something different—something exciting that takes your mind off the hustle of everyday life. This site was created as your ultimate guide to recreation and sports in Kenya

Recreation and sports activities in Kenya can range from long trips, such as climbing a mountain over the weekend or during a vacation, to something as simple as an afternoon picnic. You can go solo or with friends. However, many people often don’t know what to do, how to do it, or where to go.

The good news is that we have put together a collection of recreational activities to help pep up your life. Kenya is rich in such experiences, but surprisingly, they can be hard to find if you don’t know where to look. In many cases, these places are closer than you think—and visiting them can cost very little.

Where possible, we have provided contacts for activity providers, as we do not offer these services ourselves. If a contact is not listed, feel free to leave a comment in the comments section, and we will do our best to help you find one.

New recreational opportunities continue to emerge every day, driven by tourism and sports initiatives across various counties. As a result, there are many outdoor activities and destinations that we may not have covered on this website.

For more, see Recreation and Sports in the counties

If you know of any activities or locations we should include, please share them in the comments section. These could include hiking, swimming (in rivers, lakes, or the ocean), outdoor sports, bird watching, caving, waterfalls, canoeing, kayaking, river walks, trekking, museums, or outdoor activities for children.

We would be glad to feature them

Explore Categories

Fitness

Workouts, nutrition tips, and healthy living guides.

Outdoor Adventures

Discover breathtaking landscapes and must-visit trails while Hiking, camping, and travelling across Kenya.

Recreation

Fun activities, leisure ideas, and lifestyle inspiration.

How to Stay Fit Without a Gym

Simple workouts you can do anywhere.

Built for recreation junkies


Karura Forest Hiking Trails

Activity Walking, cycling, running
Location Nairobi, Gigiri
Starting Point Limuru Road Gate
Ending point Limuru Road Gate
Walking Duration 2 – 4 hours
Terrain Muram gravelled foot paths.
Difficulty Very easy walk.

Objective

There is something quietly magical about walking through Karura Forest. You are in the middle of Nairobi, yet it feels worlds away. The goal here is simple. Slow down. Breathe. Walk. Then push yourself just enough to complete the full distance of your chosen trail. It is both a treat and a small personal challenge.

Trail Description

Karura Forest offers over 50 km of well-marked trails. The paths wind through tall trees, open clearings, and cool shaded sections. Some are shared with runners and cyclists, adding a gentle buzz of activity without breaking the calm.

Navigation is refreshingly simple. At every junction, numbered posts quietly point the way. You follow your numbers. The forest takes care of the rest.

There are three main trails:

  • Yellow Trail – 5 km, short and easy
  • Blue Trail – 10 km, steady and satisfying
  • Green Trail – 15 km, for those who want a bit more

None of them is too difficult. But the forest has its own way of testing you. Pick up the pace and your lungs will notice. Lose focus, and you may find yourself wandering longer than planned.

Stay on the marked trails. That is part of the discipline. Dogs are not allowed off-leash, and for good reason. This is a shared space, not just for people.

Route and Highlights

Most journeys begin at the main gate along Limuru Road. The moment you step in, the city fades.

Take a few minutes at the entrance. Study the map. Note the junction numbers that define your route. Or better yet, buy a map and support the Friends of Karura, the quiet guardians of this green sanctuary.

One of the most loved routes leads to the Karura Caves and waterfall. It is about 6 km from the gate. The trail builds gently, drawing you deeper into the forest.

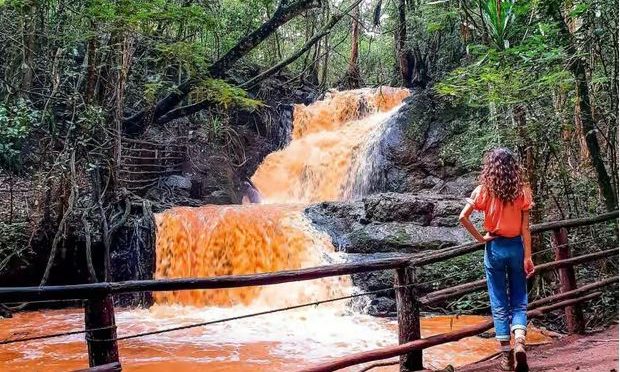
Then you hear it. A soft, steady gurgle. The waterfall is not grand, but it does not need to be. It is the kind of place where you sit, say nothing, and let the forest speak.

But Karura is not just peaceful. It is resilient. Beneath the calm lies a history of resistance. In the final years of the Nyayo era, this forest stood at the centre of fierce battles against land grabbing. There was blood. There was courage. And somehow, the forest survived.

Today, it stretches across 2,570 acres. A quiet victory.

As you walk, you are never truly alone. There are birds calling from above. Leaves rustling just out of sight. Small animals darting across the path when you least expect it. You hear more than you see. And that is part of the thrill.

Getting There

By Car

Drive along Limuru Road toward Gigiri.

If you are coming from Muthaiga, cross the bridge near the Belgian Embassy. Turn right immediately after. The entrance is easy to miss if you are not paying attention.

Traffic here can be fast. Slow down early. Signal clearly.

If you are using GPS, simply search for the Belgian Embassy.

By Public Transport

Matatus heading to Gigiri, Rwaka, or Village Market will get you close. Common routes include 11B, 106, 107, 108, 114, and 116.

Ask to be dropped at the Karura Forest gate or the Belgian Embassy. Be specific. There is another road called Karura Road nearby, and it is not the same place.

On your way back, things can be less convenient. Some matatus will not stop. If that happens, walk about five minutes to Muthaiga North Shopping Centre and catch one there.

Fees

Category Adult Child
Kenyan & EAC Citizens Ksh 100 Ksh 40
Residents Ksh 200 Ksh 100
Non-residents Ksh 600 Ksh 300

Opening Hours

The forest is open every day from 6:00 am to 6:00 pm.

Early mornings are crisp and quiet. Late afternoons glow with soft light. Both are worth experiencing.

Guiding

If you want a deeper understanding of the forest, hire a guide from Friends of Karura.

Cost: Ksh 300 for 2 hours.

Sometimes, the stories are just as valuable as the walk.

Other Facilities

  • Picnicking – Ksh 100 per person
  • Lawn tennis courts
  • Restaurant
  • Open fields for relaxation
  • Maps – Ksh 500

Karura is more than a walk. It is a pause. A reminder that even in a fast, noisy city, there are still places where you can hear yourself think.

Kijabe hill – Nathan hill Hiking Trail

Location Mai Mahiu/Longonot
Starting Point Mai Mahiu – Longonot road
Ending point Magina
Walking Duration 9-10 hours
Terrain Grass, human tracks and motorable road
Difficulty Moderate
Elevation gain 650m


The objective of the Kijabe Hill – Nathan Hill hike is to traverse the section between Mai Mahiu and Magina.

The hike takes you up Kijabe Hill (2,400 m a.s.l.), across the Old Kijabe saddle, and finally up Nathan Hill. It is a rewarding route that combines elevation gain, scenic views, and varied terrain.


Trail Overview

This hike combines two trails: Kijabe Hill and Nathan Hill.

The starting point is about 9 km from Mai Mahiu, roughly halfway to Longonot town. The trail begins at an altitude of 2,010 m a.s.l.

You start by heading north along a gentle incline. The first hour is quiet and reflective as hikers settle into their pace.

At the railway line, turn right and continue northeast toward the summit of Kijabe Hill at 2,659 m a.s.l.

This section covers about 3.2 km and takes 3 to 4 hours.


Kijabe Hill Summit

At the summit, take a short rest.

Enjoy the sweeping views of the surrounding landscape. From here, you can also spot the IDP camp below—a reminder of the area’s history.


Descent and Lunch Stop

From the summit, descend eastwards for about an hour.

You will find a good lunch spot under large euphorbia trees. The shade and quiet make it ideal for a break.


Old Kijabe Town

After lunch, continue east. Cross the railway line and head toward Old Kijabe town.

The town feels quiet and almost abandoned today. However, its small shops can still be useful for refilling water.


Forest and Mission Section

Beyond Old Kijabe, the trail flattens for about an hour.

Some sections follow the road, but most of the route passes through forest. You will walk through thick vegetation and open clearings that make great picnic spots.

As you approach Kijabe Mission, the trail gradually climbs again. You enter the mission area through back paths near the hospital.


Wathing’ito Bridge to Nathan Hill

After leaving Kijabe town at Wathing’ito Bridge, the terrain changes.

The eastern escarpment becomes steeper. The trail passes through local settlements, with many sharp turns that can feel confusing.

The final stretch is the toughest. Nathan Hill is a steep climb of about 200 metres. It looks manageable at first, but it feels much longer as you ascend.


Final Stretch and Reward

The climb up Nathan Hill is demanding. Keep a steady pace.

If the weather is clear, you will be rewarded with a spectacular sunset over the escarpment.

From here, descend toward Magina. A well-earned treat awaits—goat soup and mutura.


Fees and Logistics

  • Guide fee: Applicable
  • Guiding: Recommended
  • Local community: Engage respectfully and support local services where possible


Longonot Hiking Trail

Location Rift Valley
Starting Point Longonot park gate
Ending point Longonot park gate
Walking Duration 3 hours
Prevalent Weather Hot, dusty and windy. Afternoon showers.
Terrain Very dusty steep trail
Difficulty Moderate
Elevation gain 600m

Objective

The goal of this hike is to reach the summit of Mt. Longonot (2,780m above sea level), walk along the crater rim, and return to the park gate.


Trail Overview

The trail is relatively short—about 3.1 km to the crater rim and approximately 5 km to the summit. Despite the short distance, the hike is strenuous. Loose scree, dusty soil, and steep gradients make it physically demanding. Most hikers take about half a day to complete it.

This hike is suitable for both solo hikers and groups.


Trail Description

The hike begins at the park gate, located at around 2,150m above sea level. After registration and payment, you start on a fairly flat stretch. Along the way, you may spot zebras, warthogs, and other wildlife grazing in the distance.

You then pass the campsite, where the climb begins.

The first section is a gentle incline. It may feel manageable at first, but it gradually tests your muscles and breathing as your body adjusts to the altitude and pace. This section lasts about 30–40 minutes.

Next come the concrete steps. Here, the gradient increases sharply, and the real effort begins. After climbing the steps, you reach the first rest hut.

From there, you proceed eastward through light thicket. The trail climbs steadily, becoming steeper as you approach the crater rim. Eventually, you reach the second hut at the rim.


At the Crater Rim

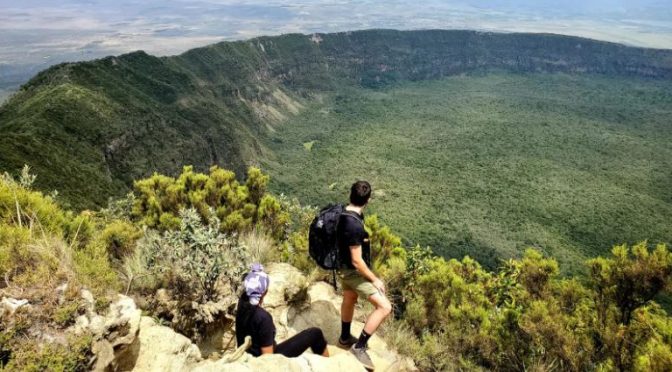
The view at the rim is breathtaking. The vast caldera stretches below, making it a perfect spot for photos and a well-earned rest.

Before heading to the summit, it’s advisable to pause and regain your energy.

You can approach the summit in two ways:

  • Clockwise route: about 5.3 km
  • Counter-clockwise route: about 1.9 km

The full circumference of the crater rim is approximately 7.2 km.

Whichever route you choose, expect a challenging trek. The loose soil, steep ascents, and frequent false peaks can be frustrating and physically demanding.


Summit Experience

At the summit, you are rewarded with sweeping views of the Great Rift Valley. On clear days, you can even see vehicles winding along the escarpment far below.

Take time to rest, hydrate, and enjoy the scenery.

From here, you can either:

  • Descend the same way you came, or
  • Complete the full crater rim circuit before heading back down.

Optional Extensions

If the main hike feels too short (it can take as little as 3 hours for fast hikers), consider these additional challenges:

1. Secondary Crater

Near the rim hut, there is a signposted detour to the secondary crater. The trail is visible at first but quickly fades. You’ll need to bushwhack through rough terrain with deep ravines, making this a more adventurous option.

2. Crater Floor

Walking anticlockwise from the rim hut, look out for a sign marking the descent to the crater floor. The drop is about half a kilometre down steep cliffs.

At the bottom, you can explore unique features such as hot vents and unusual rock formations.


Park Fees

Mt. Longonot National Park is managed by the Kenya Wildlife Service (KWS), and standard park fees apply.

  • Adults (Non-residents): $20
  • Residents and children: Charges vary (confirm current rates with KWS)

Guiding

A guide is not necessary for the main trail, as it is clearly marked. However, if you plan to explore off the main routes, a guide may be useful.

Local guides are available at the gate and may offer services, including walking sticks for hire. Decide based on your needs and experience.


Getting There

By Car

Drive to Mai Mahiu town, about 70 km from Nairobi. From there, head 9 km towards Naivasha until you see the Mt. Longonot National Park signpost. Turn off and drive 4 km to the gate.

By Public Transport

  • Take a matatu from Nyamakima (Nairobi) to Mai Mahiu (approx. KES 150).
  • From Mai Mahiu, board another matatu heading to Naivasha.
  • Alight at the Mt. Longonot turnoff.
  • Walk 4 km to the park gate.

Alternatively, you can hire a taxi, a seven-seater matatu, or take a boda boda from Mai Mahiu to the gate.


Final Notes

Mt. Longonot may be short, but it is a tough hike. Start early, carry enough water, and pace yourself. The views and sense of accomplishment at the summit make every step worth it.


If you’d like, I can also make this more storytelling-driven (like your other blog pieces) or shorten it for social media.

boda


Menengai Caldera Hiking Trail

The objective of the hiker is to trek up the Menengai hill, then down into the Mengai caldera (considered to be one of the largest in the world), down to the floor, and then back up.

This hike has some turnkey options that can be plugged in to make the hike more interesting to Kenya’s outdoors lovers. Whatever the case, it is a good day hike for anyone visiting Nakuru. Menengai Hill lies just outside Nakuru town in the Rift Valley of Kenya. That makes it readily accessible by road from any part of Kenya.

Option 1: Nairobi-Nakuru highway to Menengai floor.

Location Nakuru
Starting Point Nakuru town
Ending point Nakuru town
Walking Duration 8 hours
Prevalent Weather Hot and windy. Afternoon showers
Terrain Dusty steep trail
Difficulty Moderate
Elevation gain  500m

Option 1: Nakuru Town to Menengai Caldera Floor (Full Hike)

This is the most comprehensive and rewarding option.

The hike begins in Nakuru town and covers approximately 8 kilometres uphill. The trail passes through the leafy Milimani estate, continues through peri-urban settlements, and gradually leads to the forest gate.

After registration, payment, and a short rest, the climb resumes along a winding, motorable track. The path cuts through lightly forested terrain before opening up at the crater rim.

Take a moment here. The views are expansive and dramatic—perfect for photos and a breather.

From the rim, the trail drops steeply into the caldera. The descent is fast and loose, often forcing a controlled jog.

At the crater floor, hikers typically choose to return the same way. This is the most common route.

For the more adventurous, there is an alternative: scaling sections of the Menengai cliffs. Local folklore adds intrigue, with tales of mysterious spirits said to drift through the air at certain times of day.

Whichever route you take back up, expect a challenging ascent. Once back at the rim, rest briefly before beginning the return journey to town.

Option 2: Forest gate to Menengai floor

Location Nakuru
Starting Point Menengai forest gate
Ending point Menengai forest gate
Walking Duration 4 hours
Prevalent Weather Hot and windy. Afternoon showers
Terrain Dusty steep trail
Difficulty Moderate
Elevation gain

If you are short on time or unsure about your fitness level, this is a great alternative.

Drive to the forest gate and begin your hike from there. This significantly reduces the distance and effort required while still offering a satisfying experience of the crater.

Option 3: Menengai Rim Menengai floor.

Starting Point Menengai Viewpoint
Ending point Menengai Viewpoint
Walking Duration 1 hour
Prevalent Weather Hot and windy. Afternoon showers
Terrain Dusty steep trail
Difficulty Easy
Elevation gain

This is the shortest but most deceptive option.

Drive all the way to the crater rim, then hike down into the caldera. The descent is steep and can be slippery, making it somewhat treacherous.

The real challenge comes on the way back up. Many hikers underestimate the climb after an easy descent.

This version takes less than an hour, making it ideal if you are tight on time. However, if you have a full day available, consider combining it with other nearby activities.

Getting There

Public means: From Nairobi, take the fourteen- or seven-seater Nakuru matatus at Nyamakima Stage off River Road. Unless you have something to do deep into Nakuru, alight somewhere near the railway station to launch your hike from across the road.

In case your preferred hike is option2 or option 3, once in Nakuru, you’ll need to hire a taxi or matatu to take you to the Menengai Crater viewpoint, do your thing and take your transport back

Driving: Use either the Mai-Mahiu road or the Kimende road to Naivasha and onwards to Nakuru. Negotiate the Nakuru Railway Station Roundabout, drive towards Nairobi and take the first left turn after the railway underpass. Watch for the signposts to Menengai Crater until the forest gate for payment and registration

Fees:
This conservancy facility falls under KFS. They charge a recreation fee

Resident Adults – Ksh 200
Non-resident Adult –

Menengai Crater Hike Guide

Objective

The goal of this hike is simple but rewarding: ascend Menengai Hill, descend into the vast caldera—one of the largest in the world—reach the crater floor, and climb back up to the rim.

Overview

Menengai offers a flexible hiking experience with several route options that can be tailored to different fitness levels and time constraints. Whether you are a seasoned hiker or a casual outdoor enthusiast, this is an excellent day hike for anyone visiting Nakuru.

Located just outside Nakuru town in Kenya’s Rift Valley, Menengai is easily accessible by road from most parts of the country.

Nearby Attractions

To round off your day, consider visiting:

  • Hyrax Hill Museum, located just below Menengai
  • Lake Nakuru National Park, where you can enjoy a picnic and spot white rhinos

Final Thoughts

Menengai is more than just a hike—it is an experience. With its dramatic landscapes, flexible routes, and rich local lore, it offers something for every kind of outdoor lover.

Plan well, pace yourself, and enjoy the journey.

Ngong Hills Hiking Trail

Just a short drive from Nairobi, the Ngong Hills in Kajiado County offer one of the most accessible and rewarding hikes in Kenya. The name “Ngong” comes from the Maasai word enkong’u, meaning “knuckles”—a fitting description, as the hills resemble the knuckles of a clenched fist when viewed from a distance.

The trail consists of a series of seven rolling hills, each peak rising slightly higher than the last, with the highest reaching 2,460 metres above sea level. Whether you choose to summit all seven or turn back midway, this hike is beginner-friendly and flexible.

Location Ngong
Starting Point Ngong town
Ending point Option one 1: Ngong town
Option two 2: Kona Baridi
Walking Duration 5 hours
Prevalent Weather Windy
Terrain Motorable road, human foot paths on grass
Elevation Difference  500m
Difficulty Moderate

Objective

The goal of this hike is to traverse the iconic Ngong Hills ridge—either climbing all seven peaks and returning to the starting point, or crossing over to the opposite side. Because the trail allows for easy turnaround at any point, it is ideal for hikers of varying fitness levels.


Route Options

Option 1: Ngong Hills Return Trail

The hike begins in Ngong Town at an elevation of about 1,960 metres. From town, head east along the road toward the government offices, continuing to the Oloolaiser Secondary School turnoff. Take a right just after the police station.

The first 2 km stretch leads to the forest gate along a motorable road, passing through local settlements. At the gate, register with the Kenya Forest Service (KFS), take a short break, and continue.

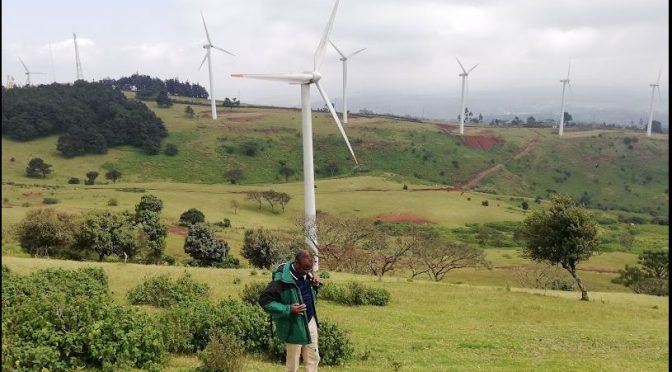
Beyond the gate, the trail ascends gently through a mix of light forest, open grassland, and sections of the wind farm. You’ll pass the pilot beacon, a marker used for aircraft approaching JKIA, before joining a footpath into the rolling hills.

From here, the terrain alternates between climbs and dips over several “false peaks.” Along the way, you’ll enjoy sweeping views of the Great Rift Valley on one side and Nairobi’s skyline on the other.

After a few peaks, the trail briefly enters a quiet forested section—beautiful but worth traversing with caution, as wildlife such as buffalo may be present.

At the summit, take time to rest, snack, and enjoy the views before retracing your steps back to Ngong Town.


Option 2:  Ngong Hills Traverse Trail

Follow the same route as above up to the main peak. After a short rest, continue along the ridge instead of turning back.

The trail opens into expansive grasslands with stunning views of Ole Sekut Hills, Ole Polos, and the Magadi plains stretching below. From here, the path descends steadily toward Kona Baridi.

This option offers a more dynamic experience, ending on the opposite side of the hills.


Getting There

By Public Transport

Take bus number 111 from the Railways Terminus in Nairobi to Ngong Town.

  • If starting from town, you can begin the hike directly.
  • If starting from the forest gate, hire a boda boda, taxi, or tuk-tuk.

For the traverse route, take a matatu from Kona Baridi to Kiserian, then connect back to Nairobi via Rongai or Ngong.


By Car

Drive to Ngong Town and park in designated parking areas (fees apply on weekdays). Alternatively, drive to the forest gate and park there.

For the traverse hike, consider arranging for your vehicle to be driven to Kona Baridi. Allow 4–5 hours for the hike.


Other Activities Near Ngong Hills

You can easily combine the hike with:

  • Picnicking at Ngong Hills
  • Nyama choma at Ole Polos
  • Swimming at Ole Tepesi
  • Swimming at Ole Polos
  • Swimming at Jordan Breeze

Entry Fee

Payable at the gate to Kenya Forest Service (KFS):

  • Adults: Ksh 200

Safety Tips

There have been occasional reports of theft targeting small groups or solo hikers. For safety:

  • Avoid hiking alone
  • Consider hiring an armed escort from KFS rangers or Administration Police
  • Stay aware of your surroundings throughout the hike

Final Thoughts on Ngong Hills

Ngong Hills is one of those hikes that delivers big rewards with relatively low commitment. The combination of rolling terrain, dramatic views, and proximity to Nairobi makes it perfect for a day adventure. Whether you conquer all seven hills or simply enjoy a few, the experience is always worth it.


If you want, I can match this style to your other guides (Longonot, Menengai, etc.) so they all feel like one consistent blog series.